
How to Create and Publish SMART-on-FHIR Apps
Introduction
The Greenway Health Developer Platform makes building SMART-on-FHIR applications easy; enabling you to build and deploy applications that work with clinical data stored in Greenway Health electronic health record (EHR) systems such as Intergy and Prime Suite. Applications you build can be embedded inside the EHR, taking advantage of user and patient context, to provide clinicians with functionality at the point of care, or they can function on their own to provide functionality directly to users, independent of the EHR.
Developer Registration
Our FHIR API documentation is always available to the public - no registration or login is required.
Once you are ready to build and deploy SMART-on-FHIR apps, you can register on the Greenway Health Developer Platform by following these steps:
- Go to the registration page.
The Create your account screen appears.

Greenway Developer Platform main screen
- Fill in your relevant details, read and accept the Terms of Service, select the Acceptance check box and select the Submit button.
Once you register, you are re-directed to the Greenway Health Identity Services authentication screen. In parallel, a PIN is sent to your email and will navigate you to the password form where you can set your password.

Account creation details

Greenway Health One Time Pin Email

Password confirmation
- Once your User Name and Password are set, navigate back to the FHIR Dashboard, enter your credentials that you filled during registration and select the Sign On button.

Greenway Health User Credentials
App Registration
- Once you sign on using your credentials, the app screen appears. Select the Add App button.
The New App screen appears, where you can fill in the mandatory fields.

Greenway Developer Platform Default Applications
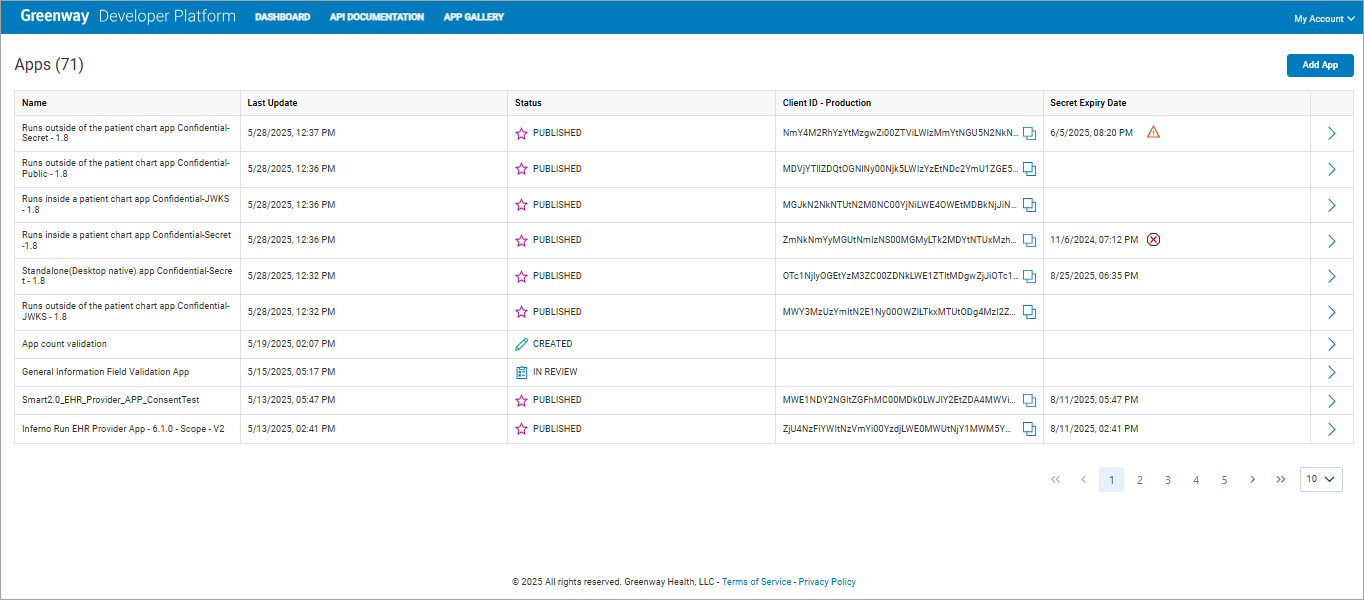
Apps List
Note
- Secret Expiring Soon: This icon indicates that an app's secret will expire within the next 15 days.
- Secret Expired: This icon indicates that an app's secret has already expired.
- Initially, the Apps screen is empty as you are a first-time user and have not created any apps.
- Please update the Intended Purpose(s) and Intended User(s) for your apps using the Edit App screen if not done.
- This banner will be displayed if at least one app has not had its Intended Purpose(s) and Intended User(s) updated.

New application creation details
Note
Short description should be between 15 to 250 characters.
For Provider/Patient Facing option, select:
Provider: if you are designing the app for a Doctor/Nurse/Person providing third party care services.
Patient: if you are designing the app for an individual.
Intended Purpose of the App: Identify the primary function of the application, such as:
- Administrative tasks
- Clinical tools
- Patient access to health information
- Research
- Population data management
- Public health
- Patient-provider communication
- Educational resources
- other purposes.
Intended User of the App: Determine the target user group, including:
- Individuals/caregivers
- Clinical teams
- Healthcare administrators/executives
- Payers
- Researchers
- Other users
- Once you fill in all relevant fields, select the Add App button.
The App Details screen appears. Select the pencil icon to edit the Technical Details and General information sections, respectively.
NoteThe Technical Details and General Information sections are mandatory while the Documentation section is optional.

Application details during registration
-
Select the Application Launch Type based on the type of app that you are designing:
-
Standalone - The app is built for the Web/Desktop/Mobile.
-
EHR embedded - The app is built to run within the EHR, in one of two contexts:
-
Runs inside a patient chart - The app retrieves data only for a particular patient. In other words, the app is tied to a Patient Id.
-
Runs outside a patient chart - The app retrieves data for patients who are part of the EHR system, that is, the app retrieves data for multiple Patient IDs.
-
-
Back-end Service – The app does not have a user interface and it runs independently of any user interaction. (This is also used for Bulk FHIR.)
-
-
Select the Authentication Type. If you are developing a javascript/HTML5 or mobile application, or are not sure, select Public. If the app logic will execute on a trusted server, select Confidential.
-
Select the Launch context. If this is a standalone application that requires a patient, select launch/patient. If the standalone application also requires an encounter, select launch/encounter
-
Select Scopes. If your application is intended for use with a single patient, select the Scopes for Individual Patient button followed by the resources you wish to enable. If the application is intended for use with multiple patients, select the Scopes for Multiple Patients button followed by the resources you wish to enable.

Patient scope details and Smart Launch URL
- When finished, go to the bottom of the screen and select Save.
- Select Register
The app is registered accordingly.

Select Register

Registered application
- Select the pencil again and then enable the Production slider; typing in a URL that is unique to your application for both Smart Launch URL and Redirect URL sections, respectively. The Smart Launch URL will trigger the authentication process and navigate your app user to a Login Screen where your user provides their credentials. Once authenticated, the user redirects to the Redirect URL.
NoteIf you want to test your app by directing the Smart Launch URL and Redirect URL to your own machine while you develop, you can add an entry to your hosts file, or use a DNS alias service for localhost such as lvh.me. You can, of course, host your application anywhere you choose. One helpful option for this while you develop your app is GitHub.
- Select Submit for Review.
A confirmation popup displays accordingly.
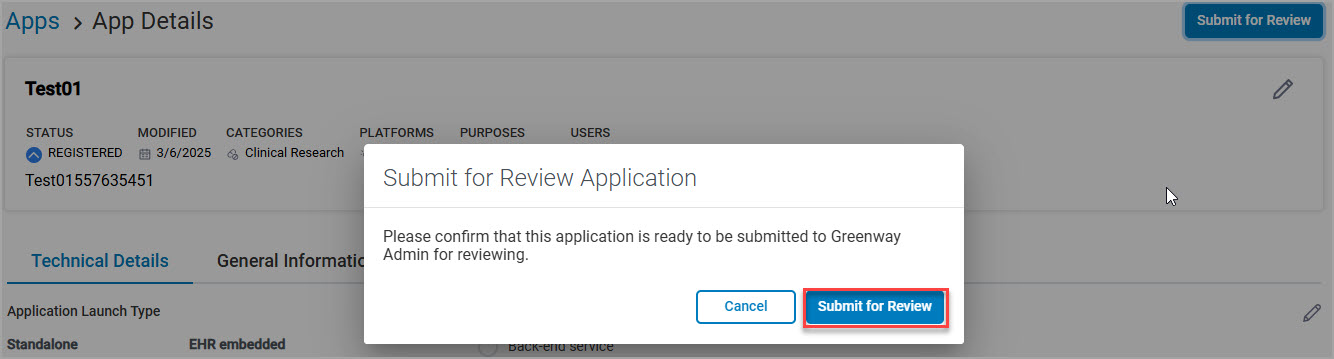
Confirmation popup
- Select Submit for Review in the popup message.
An Application Submission Successful message displays accordingly.
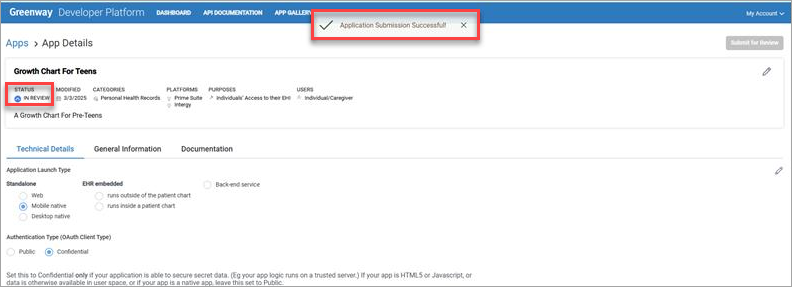
Application Submission Successful
NoteOnce you submit your application for review, in the backend, the Greenway Health admin checks your submitted app for Technical Details, General Information and Documentation that supports your application. In case the admin is not satisfied with this information or feels that some correction is required for your submitted application, you will receive an email to this effect asking for the information to be provided or corrected.
Once the admin is satisfied that you have provided all relevant information for the submitted application, it is published in the App Gallery page of Greenway Health.
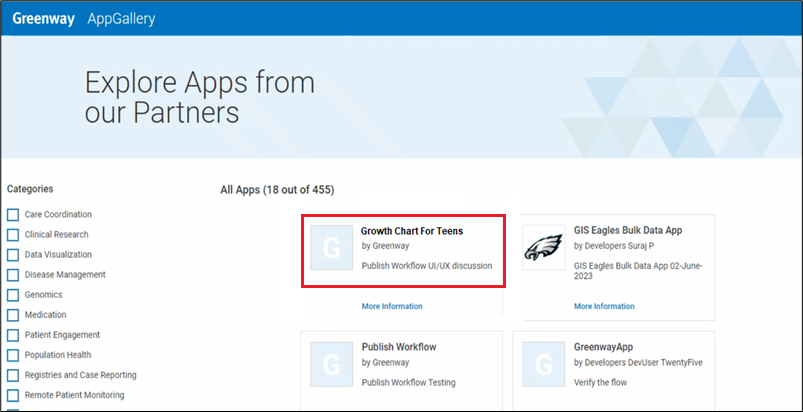
Application published in the app gallery
You can select the More Information link below any of the apps in the list to view its details.
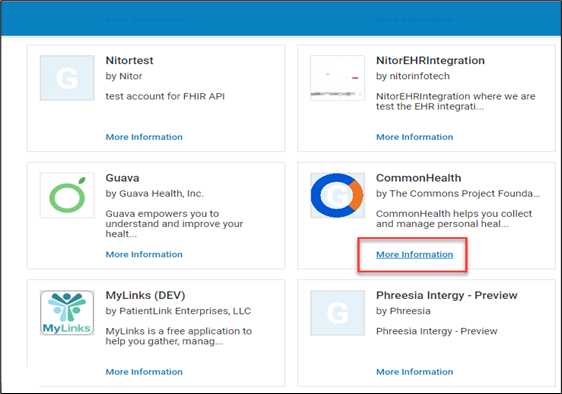
Link for More Information
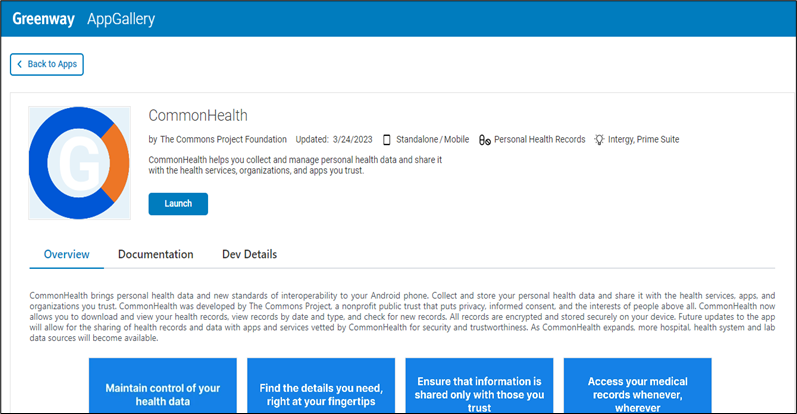
Application details
Note
- Select Launch to launch the applications on display in the App Gallery screen.
- Select the Deactivate button at the top right of the App Details screen to deactivate an app that you create.
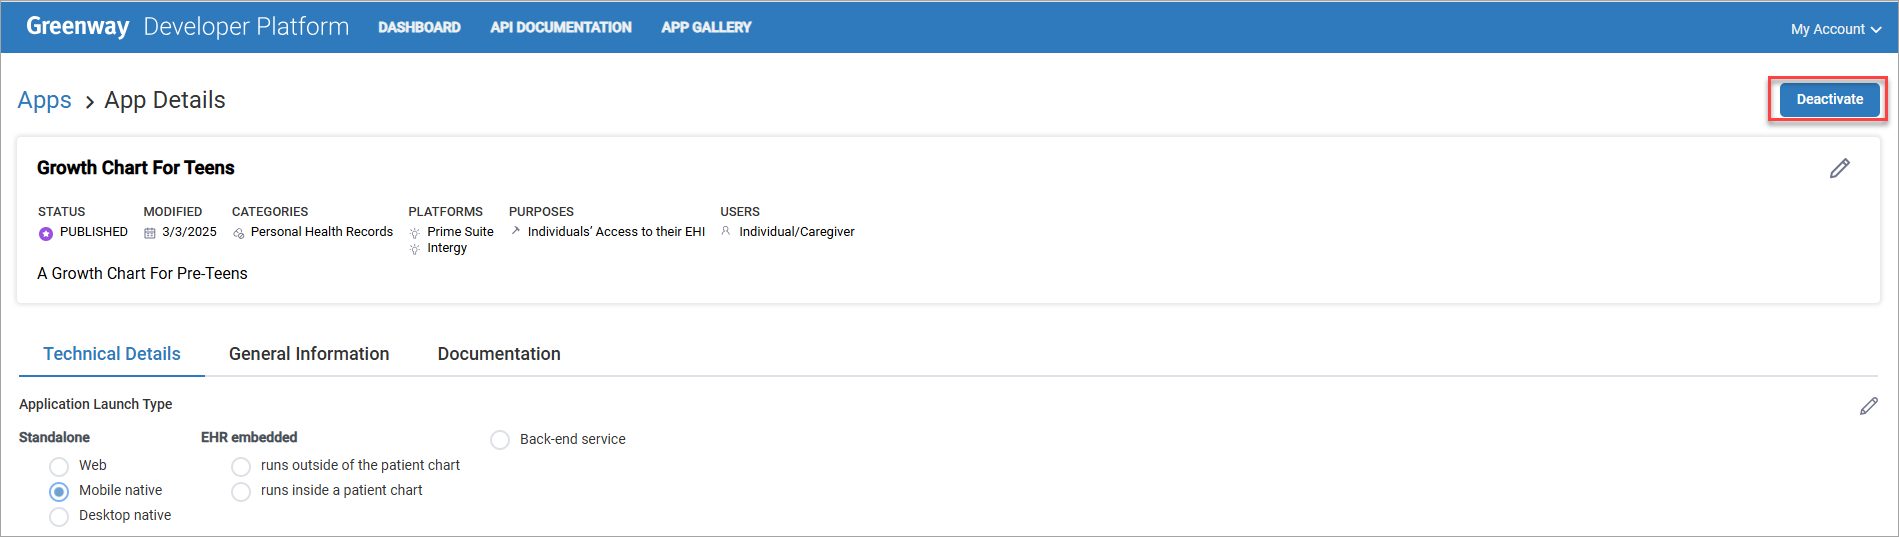
Deactivate an application